Shiny + GenAI
Shiny makes it easy to create rich, interactive experiences in pure Python with a fully reactive framework. No JavaScript required!
Here we will use the Python chatlas package to interface with a large language model (LLM), and the Python querychat package to have the LLM work with filtering our dataframe via (tool calling)[https://shiny.posit.co/py/docs/genai-tools.html].
Before you get started, make sure you have a Python IDE open. You can give positron a try!
Here’s the application we’ll be building. It uses the Anthropic (Claude) model, and in this lab, we’ll use an Ollama local model.
Chatlas
chatlas provides a simple and unified interface across large language model (llm) providers in Python
It helps you prototype faster by abstracting away complexity from common tasks like streaming chat interfaces, tool calling, structured output, and much more.
Switching providers is also as easy as changing one line of code. We’ll be using the ChatOllama() model in this tutorial.
Here is the list of supported models you can use:
- Anthropic (Claude):
ChatAnthropic() - GitHub model marketplace:
ChatGithub() - Google (Gemini):
ChatGoogle() - Groq:
ChatGroq() - Ollama local models:
ChatOllama() - OpenAI:
ChatOpenAI() - perplexity.ai:
ChatPerplexity()
Models from enterprise cloud providers:
- AWS Bedrock:
ChatBedrockAnthropic() - Azure OpenAI:
ChatAzureOpenAI() - Databricks:
ChatDatabricks() - Snowflake Cortex:
ChatSnowflake() - Vertex AI:
ChatVertex()
querychat
querychat is a Shiny module that allows us to chat with your Shiny Python apps using natural language.
This can give the user a lot of flexibility on how they want to view the data, without having to put in many user input components.
Shiny + GenAI
We will now build a small app that uses the querychat UI and displays the reactive filtered dataframe.
Step 0: LLM setup
The code below uses the llama3.2 model from Ollama. You will need to have this installed before running the code. Or make sure you change the code for the model you plan to use.
For more about LLM setup see the LLM Setup Page.
Step 1: Create the application
Save the following code to an app.py file.
import querychat
from chatlas import ChatOllama
from seaborn import load_dataset
from shiny.express import render

# data -----
titanic = load_dataset("titanic")

# chatbot setup -----
def create_chat_callback(system_prompt):
    return ChatOllama(
        model="llama3.2",
        system_prompt=system_prompt,
    )


querychat_config = querychat.init(
    titanic,
    "titanic",
    greeting="""Hello! I'm here to help you explore the Titanic dataset.""",
    create_chat_callback=create_chat_callback,
)

chat = querychat.server("chat", querychat_config)

# shiny application -----

# querychat UI
querychat.sidebar("chat")

# querychat filtered dataframe
@render.data_frame
def data_table():
    return chat["df"]()
You can expand on the welcome message by adding this text to the greetings parameter.
Below are some examples of tasks I can do.

Filter and visualize the data:
- Show passengers who survived, sorted by age.
- Filter to show only first class female passengers.
- Display passengers who paid above average fare.

Answer questions about the data:
- What percentage of men survived versus women?
- What was the average age of survivors by class?
- Which embarkation point had the highest survival rate?
Step 2: Run the application
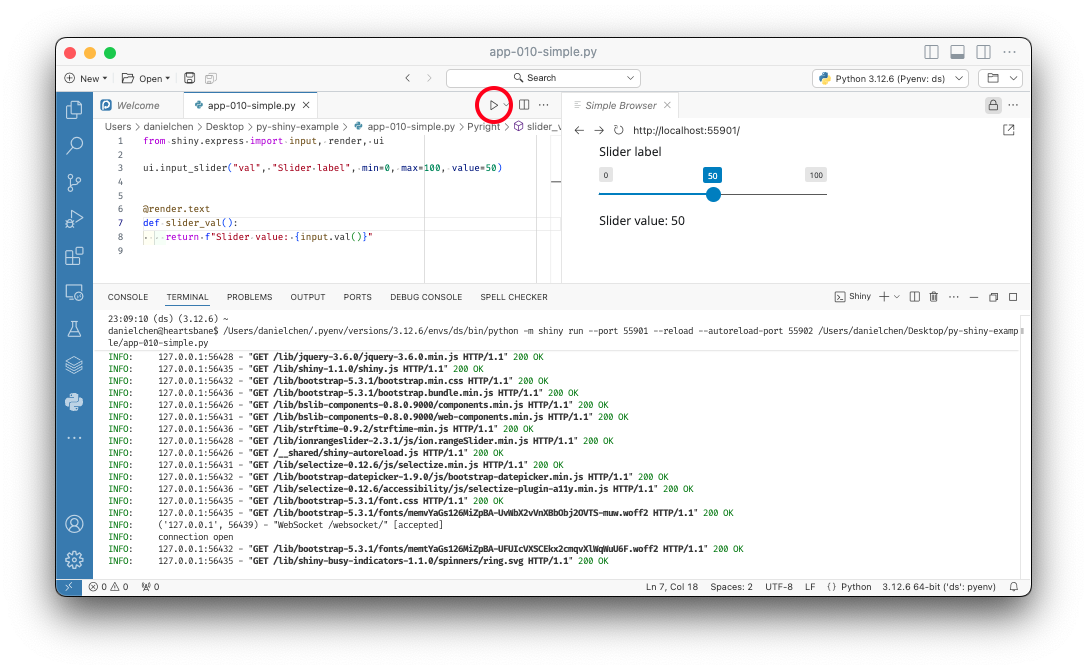
Run your application by either clicking the Play button from the VS Code Shiny Extension.

Or in the terminal with shiny run.
shiny run --reload --launch-browser app.pyYou can learn more about running Shiny applications on the Shiny Get Started Page
Anthropic (Claude)
If you want to recreate the actual app shown at the top of this lab, by switching the model to using Antrhopic (Claude), chatlas makes this very easy to do by changing the call from ChatOllama() to ChatAnthropic().
def create_chat_callback(system_prompt):
    return ChatAnthropic(system_prompt=system_prompt)
You will then need to create an .env file with the line containing your Anthropic API key.
ANTHROPIC_API_KEY=<Your Anthropic API key>