This article will cover how to build a chatbot powered by a Large Language Model (LLM) using shinychat and ellmer. ellmer will handle connecting to and communicating with the model, while shinychat will handle the user interface for your chatbot.
You will need to install both shinychat and ellmer.
install.packages(c("shinychat", "ellmer"))Setup
Choose a model
First, choose a model to power your chatbot. ellmer and shinychat support a wide variety of LLM providers including Anthropic, OpenAI, Vertex, Snowflake, Groq, Perplexity, and more.
With ellmer, you specify the LLM provider by choosing the
corresponding chat_*() function, e.g.,
chat_anthropic(), chat_openai(), etc. This
makes it easy to swap out the chat provider to a different one at any
time.
Model providers also typically offer a variety of models. To specify
a particular model, use the chat_*() function’s
model argument. For example:
ellmer::chat_openai(model = "o3")If you don’t specify the model argument, the
chat_*() function will use a reasonable default. For more
information, see the individual chat_*() function’s documentation.
Set up credentials
Next, authenticate with your LLM provider. Popular model providers
like OpenAI and Anthropic require an API key. We recommend storing these
API keys in your .Renviron (e.g., as
OPENAI_API_KEY or ANTHROPIC_API_KEY).
You can find some helpful links and tips for getting set up with
credentials (e.g., an API key) on the relevant reference page for the
chat_*() provider you’d like to work with (chat_openai(),
chat_anthropic()).
Create a basic chatbot
Once you’ve identified which model provider you want to use and set up the necessary credentials, you’re ready to create a chatbot. The following code creates a basic chatbot in a Shiny app.
Copy and paste the code into an R script, switching out
ellmer::chat_openai() for your desired chat function. Save
the file as app.R and then run the app.
library(shiny)
library(shinychat)

ui <- bslib::page_fluid(
  chat_ui("chat")
)

server <- function(input, output, session) {
  chat <- ellmer::chat_openai()

  observeEvent(input$chat_user_input, {
    stream <- chat$stream_async(input$chat_user_input)
    chat_append("chat", stream)
  })
}

shinyApp(ui, server)
Congrats, you now have a chat interface powered by an LLM of your choice! 🎉
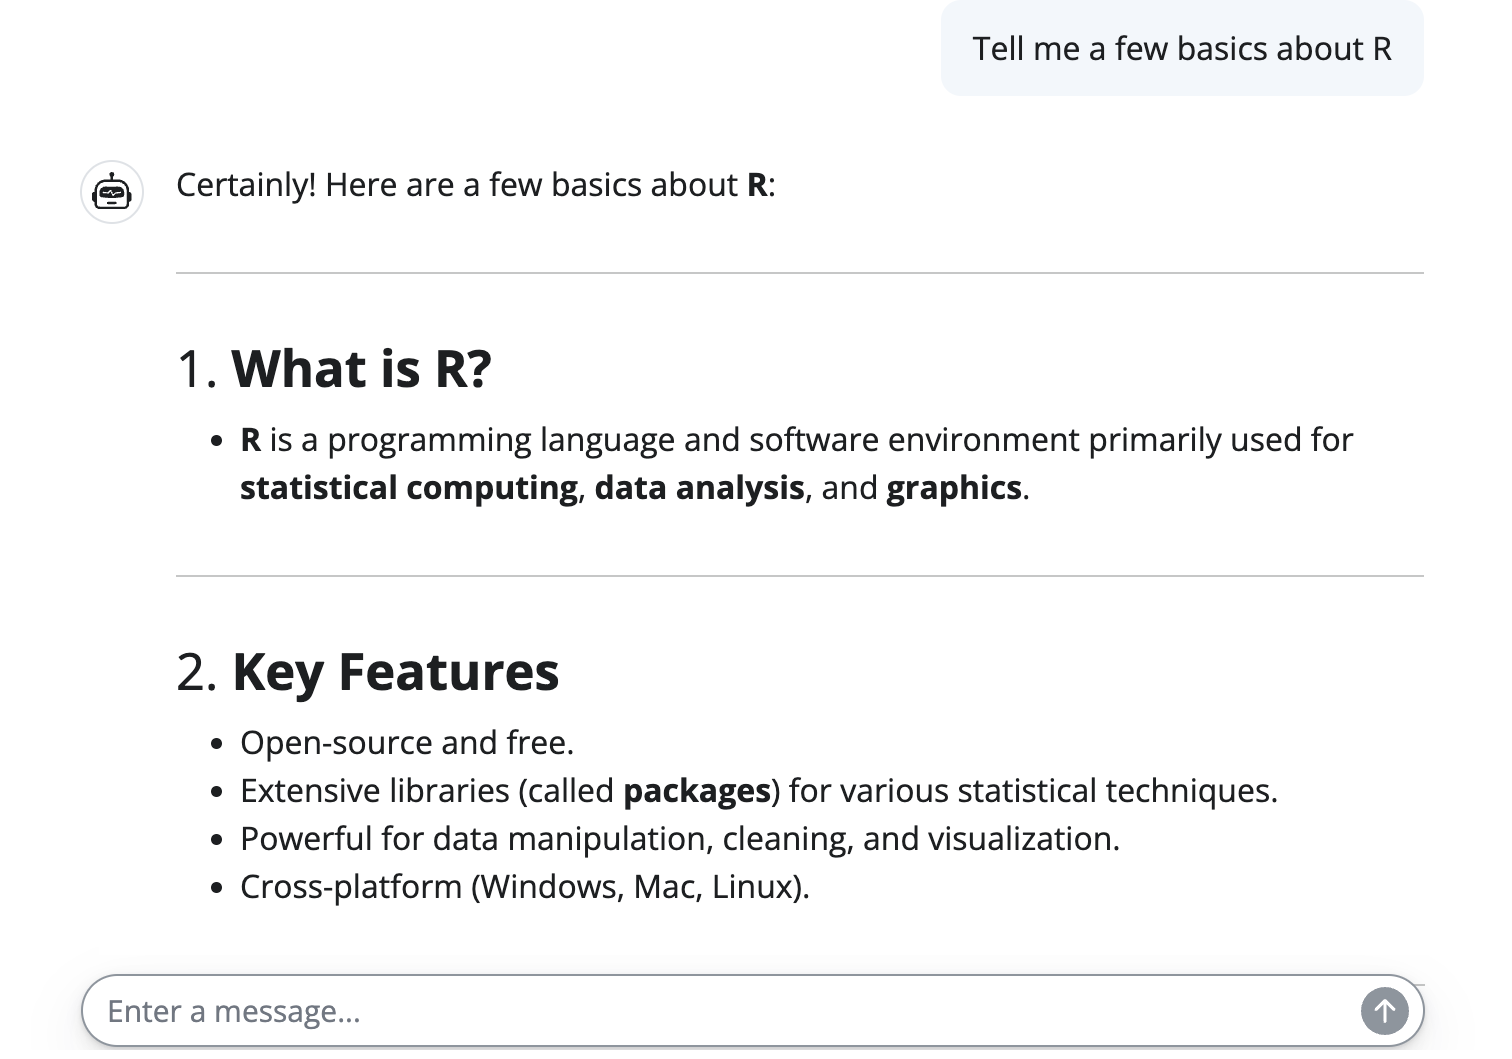
Screenshot of a conversation using shinychat.
Inspect the code
Let’s take a closer look at the code in app.R.
library(shiny)
library(shinychat)

ui <- bslib::page_fluid(
  # Add a chat UI element
  chat_ui("chat")
)

server <- function(input, output, session) {
  # Initialize a chat with your chosen model provider
  chat <- ellmer::chat_openai(system_prompt = "You are a helpful assistant.")

  # Listen for user input and communicate with the model
  observeEvent(input$chat_user_input, {
    stream <- chat$stream_async(input$chat_user_input)
    chat_append("chat", stream)
  })
}

shinyApp(ui, server)
A shinychat chatbot includes three core steps:
Create a chat UI element with
chat_ui().Initialize a chat with a
chat_*()function, likechat_openai(), in the server function. Use a differentchat_*()function (chat_ollama(),chat_anthropic(), etc.) to use a different model provider. You can also use thesystem_promptargument to supply a system prompt.-
Set up a reactive listener with
observeEvent()that waits for the user to submit a message (input$chat_user_input). When a message is received:- Send the input to the LLM using
chat$stream_async(), which returns asynchronously streaming results from the LLM. This means the results will appear in chunks, so the user doesn’t have to wait for the full response. - Append the response to the
chat_ui()element withchat_append(), so the user can see the model’s reply appear live as it’s generated.
- Send the input to the LLM using
Add a system prompt
Use the chat_*() function’s system_prompt
argument to provide the LLM with more information about how you would
like it to behave.
chat <- ellmer::chat_ollama(system_prompt = "You are a helpful assistant")To learn more about writing system prompts, see ellmer’s Prompt
design vignette. Generally, we recommend writing the system prompt
in a separate markdown file, but if your prompt is short you can also
supply it directly as a string to the system_prompt
argument.
Add messages and suggestions
On startup
You can specify messages to show when the chat first loads by using
chat_ui()’s messages argument. You can use
markdown or HTML to format these messages.
chat_ui(
    id = "chat",
    messages = "**Hello!** How can I help you today?"
)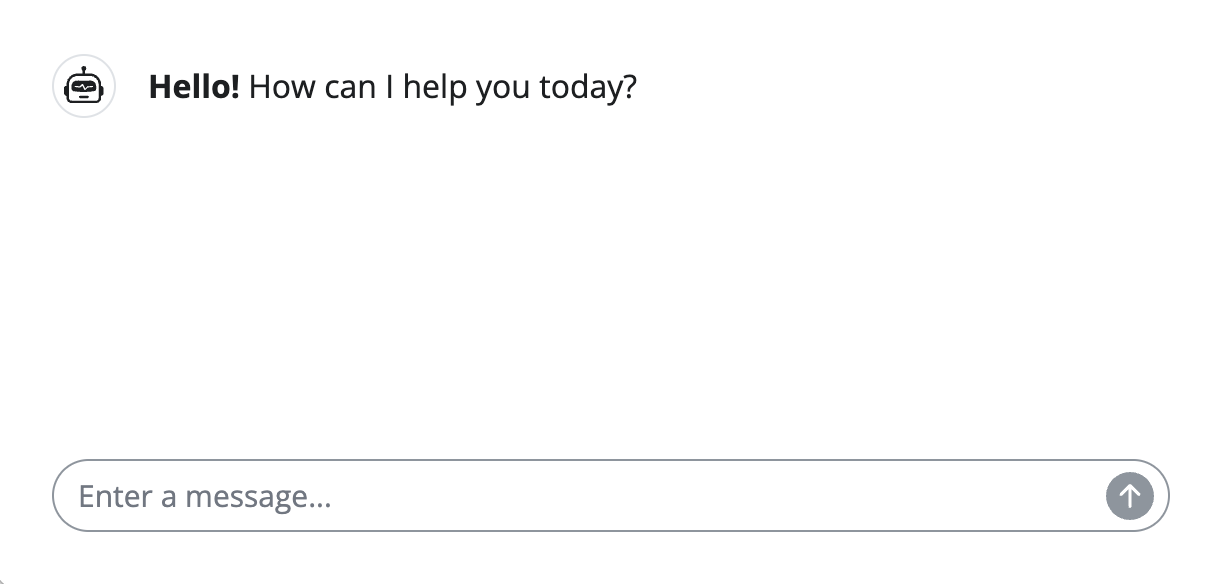
Screenshot of a chatbot with a welcome message.
You can also suggest inputs to the user by adding the
suggestion CSS class to the relevant portions of the
message. Similarly, use the submit class to make clicking
on the suggestion submit the input automatically.
messages <-
  '
  **Hello!** How can I help you today?

  Here are a couple suggestions:

  * <span class="suggestion">Tell me a joke</span>
  * <span class="suggestion submit">Tell me a story</span>
  '

ui <- bslib::page_fillable(
  chat_ui(
    id = "chat",
    messages = messages
  )
)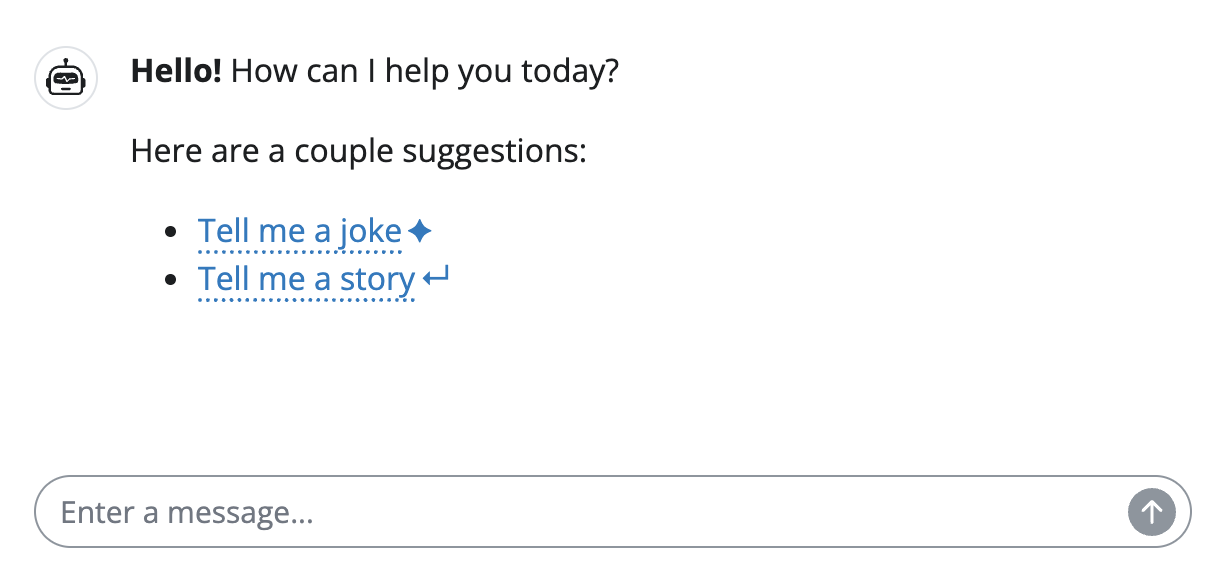
Screenshot of a chatbot with input suggestions.
A markdown list (<ul> or <ol>)
in which every item contains a single suggestion element is
automatically rendered as a grid of clickable cards instead of inline
chips. Each suggestion accepts an optional title attribute
(plain text), which becomes the card heading; the suggestion’s body
becomes the card description. For ordered lists
(<ol>), the list-item number is included in the
heading.
Messages can also contain arbitrary Shiny UI components, so you could even include something like a tooltip to provide additional details on demand.
Mid-conversation
You can also use suggestions to guide users through a multi-turn conversation. To do so, you’ll need to instruct the AI how to generate suggestions itself by adding a section like the one below to your system prompt:
## Showing prompt suggestions

If you find it appropriate to suggest prompts the user might want to write, wrap the text of each prompt in `<span class="suggestion">` tags.
Also use "Suggested next steps:" to introduce the suggestions. For example:

```
Suggested next steps:

1. <span class="suggestion">Suggestion 1.</span>
2. <span class="suggestion">Suggestion 2.</span>
3. <span class="suggestion">Suggestion 3.</span>
```
Layouts
Screen-filling layout
Use page_fillable()
with fillable_mobile = TRUE if you want the chatbot input
to stay anchored at the bottom of the page and the chat to fill the
remaining space.
ui <- bslib::page_fillable(
  chat_ui("chat", messages = "Welcome!"),
  fillable_mobile = TRUE
)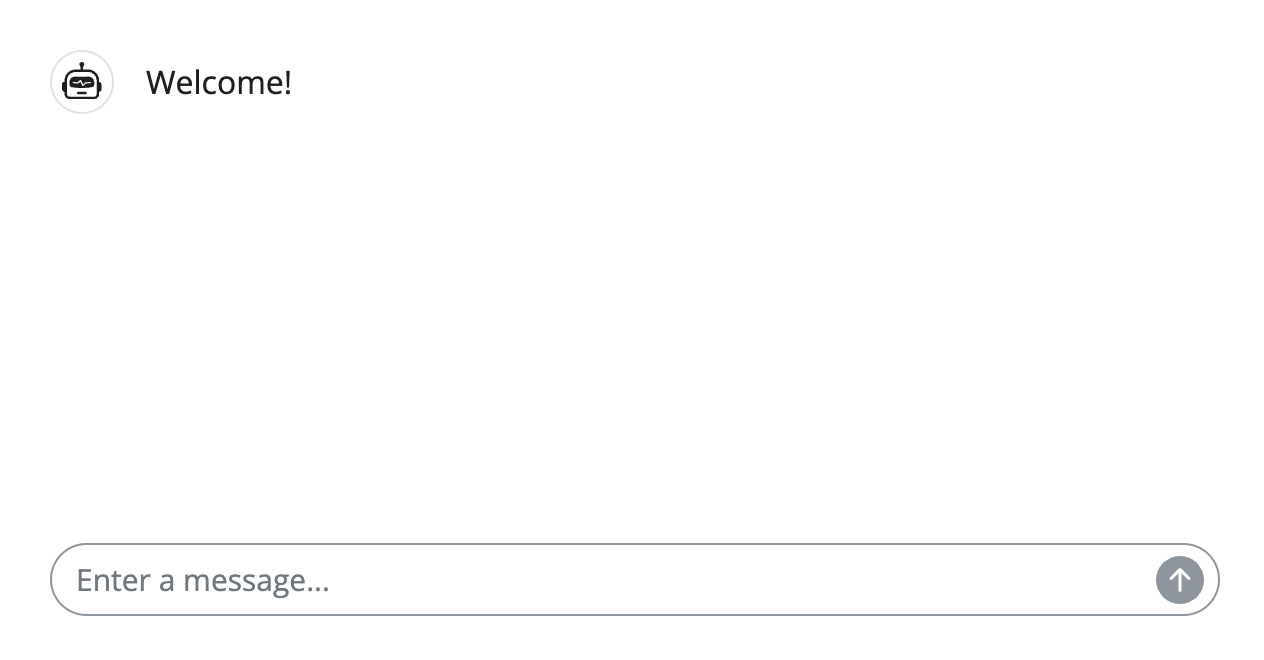
Screenshot of a chatbot filling the page.
Sidebar layout
It can also be useful to place the chat in a sidebar, to free up the
main panel for other components. Use page_sidebar()
to create a sidebar page. Then, set the chat and sidebar’s heights to
100% so that the chat element fills the sidebar.
library(shiny)
library(bslib)
library(shinychat)

ui <- bslib::page_sidebar(
  sidebar = sidebar(
    chat_ui(
      "chat",
      messages = list(
        "Welcome! Here is a <span class='suggestion'>suggestion</span>."
      ),
      height = "100%"
    ),
    width = 300,
    style = "height: 100%;"
  ),
  "Main content",
  fillable = TRUE
)

server <- function(input, output, session) {
  chat <- ellmer::chat_openai()

  observeEvent(input$chat_user_input, {
    stream <- chat$stream_async(input$chat_user_input)
    chat_append("chat", stream)
  })
}

shinyApp(ui, server)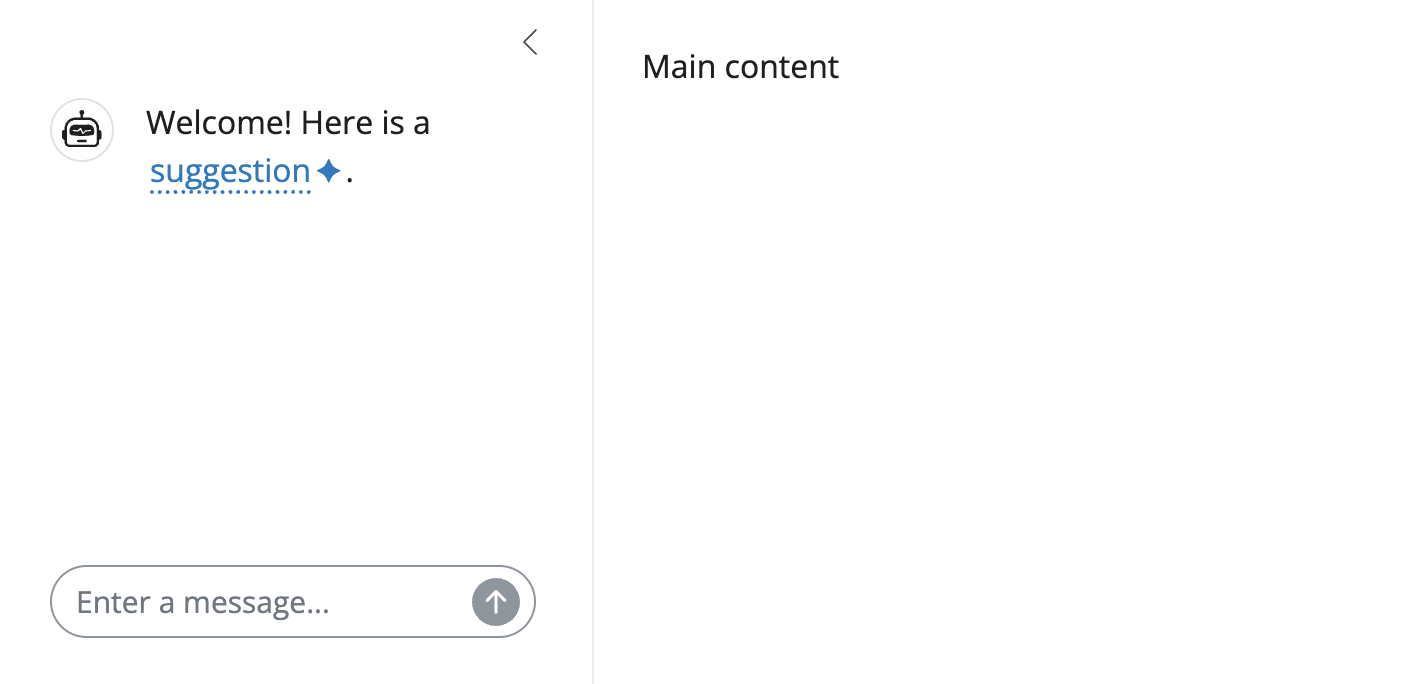
Screenshot of a chatbot filling a sidebar.
Card layout
Embedding the chat component inside a card() can help
visually separate the chat from the rest of the app. You can also add a
card header to include more information about your chatbot (perhaps with
a tooltip).
Cards
also come with other handy features like full_screen = TRUE
to make the chat full-screen when embedded inside a larger app.
library(shiny)
library(bslib)
library(shinychat)

ui <- page_fillable(
  card(
    card_header(
      "Welcome to Posit chat",
      tooltip(icon("question"), "This chat is brought to you by Posit."),
      class = "d-flex justify-content-between align-items-center"
    ),
    chat_ui(
      id = "chat",
      messages = "Hello! How can I help you today?"
    )
  ),
  fillable_mobile = TRUE
)

server <- function(input, output, session) {
  chat <- ellmer::chat_openai()

  observeEvent(input$chat_user_input, {
    stream <- chat$stream_async(input$chat_user_input)
    chat_append("chat", stream)
  })
}

shinyApp(ui, server)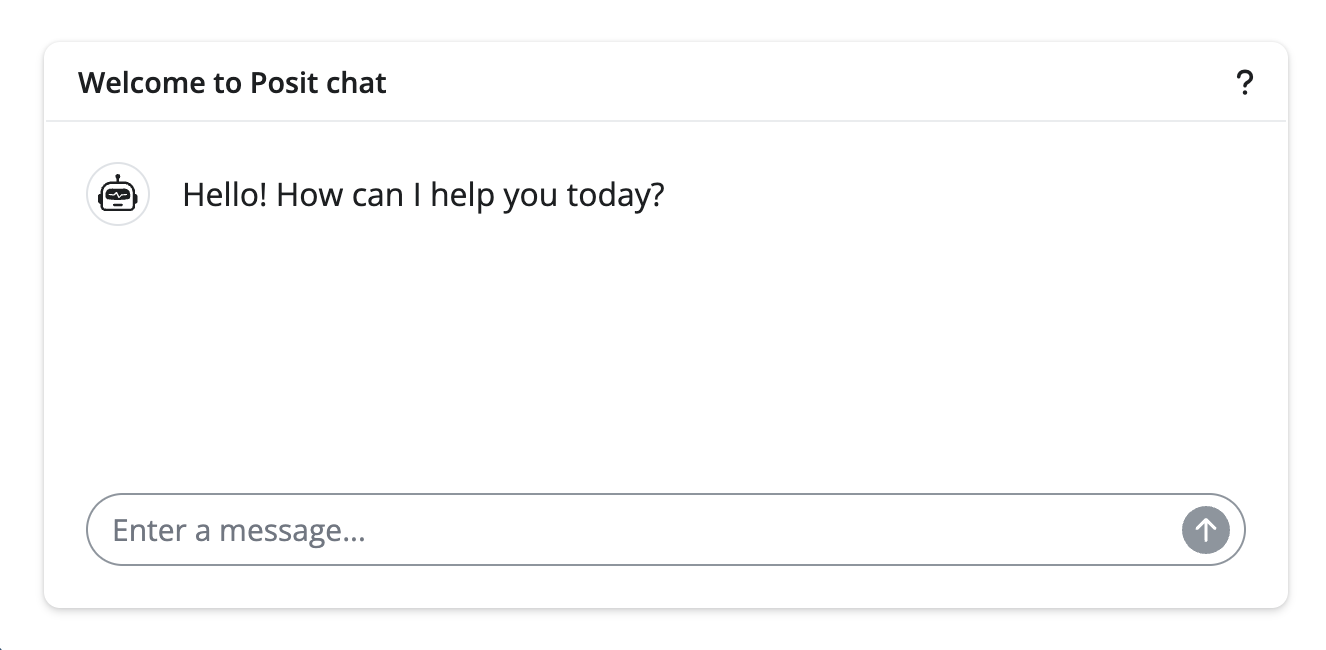
Screenshot of a chatbot embedded in a card with a header and tooltip.
Stream cancellation
shinychat supports cancelling an in-progress AI response. When cancellation is enabled, a stop button appears in the chat input area during streaming. Users can also press Escape while the chat has focus to cancel the current response. Any partial response already received is preserved in the chat history.
Using the chat module (recommended)
The easiest way to add cancellation support is to use the
chat_mod_ui() and chat_mod_server() functions.
The module handles everything automatically — the stop button is shown
during streaming and wired up internally, with no extra code
required.
library(shiny)
library(bslib)
library(shinychat)
library(ellmer)

ui <- page_fillable(
  chat_mod_ui("chat")
)

server <- function(input, output, session) {
  chat <- chat_anthropic(system_prompt = "You are a helpful assistant.")
  chat_mod_server("chat", client = chat)
}

shinyApp(ui, server)
Manual approach
If you are building a custom chat UI with chat_ui()
directly, you can enable cancellation by setting
enable_cancel = TRUE and wiring up the cancel input in your
server function.
The key steps are:
- Pass
enable_cancel = TRUEtochat_ui()to show the stop button during streaming. - Create an
ellmer::stream_controller()and pass it tochat$stream_async()via thecontrollerargument. The controller automatically resets between streams, so you only need to create it once. - Observe
input$<id>_cancel(where<id>is your chat element’s ID) and callctrl$cancel()when it fires.
ui <- page_fillable(
  chat_ui("chat", enable_cancel = TRUE)
)

server <- function(input, output, session) {
  chat <- ellmer::chat_openai(system_prompt = "You are a helpful assistant.")
  ctrl <- ellmer::stream_controller()

  chat_task <- ExtendedTask$new(function(user_input, controller) {
    stream <- chat$stream_async(
      user_input,
      stream = "content",
      controller = controller
    )
    p <- promises::promise_resolve(stream)
    promises::then(p, function(stream) {
      chat_append("chat", stream)
    })
  })

  observeEvent(input$chat_user_input, {
    chat_task$invoke(input$chat_user_input, controller = ctrl)
  })

  observeEvent(input$chat_cancel, {
    ctrl$cancel()
  })
}

shinyApp(ui, server)