# Authoring QMD Files
Great Docs sites are built from **`.qmd` files** (Quarto Markdown). If you've written Markdown before, you're already most of the way there. The `.qmd` format extends standard Markdown with YAML frontmatter, executable code blocks, cross-references, callouts, and more. This page teaches you everything you need to write rich documentation pages.
# What Is a `.qmd` File?
A `.qmd` file is a plain-text file with three parts:
1. **YAML frontmatter**: metadata at the top of the file, enclosed in `---` fences
2. **Markdown body**: the content of the page, written in Markdown
3. **Optional executable code**: code blocks that Quarto can run and embed output from
Here's the simplest possible `.qmd` file:
my-page.qmd
``` yaml
---
title: "My Page"
---
This is a documentation page.
```
When Great Docs builds the site, Quarto converts each `.qmd` file into a styled HTML page with navigation, search, and theming applied automatically.
Understanding this three-part structure is all you need to start writing pages. The rest of this guide explores each part in detail so you can take full advantage of `.qmd` capabilities.
# Where You'll Use This
As you build out your documentation site, you'll author `.qmd` files in several contexts:
- **User Guide pages**: narrative documentation such as tutorials, installation instructions, and conceptual explanations (see [User Guides](user-guides.md))
- **Custom sections**: additional page groups like examples, tutorials, FAQs, or cookbooks that you define in `great-docs.yml` (see [Custom Sections](custom-sections.md))
- **Blog posts**: time-stamped articles for announcements, release notes, or technical deep dives (see [Blog](blog.md))
All of these use the same Markdown syntax, frontmatter, callouts, tabsets, and other features covered on this page. Once you learn the authoring basics here, they transfer directly to every part of your site.
> **Tip: Docstrings Are Markdown Too**
>
> Much of what you learn here also applies to writing Python docstrings. Great Docs renders docstrings through Quarto, so formatting like **bold**, `inline code`, lists, tables, and even callouts works inside your docstrings as well. You can even embed executable code cells in docstrings, which means your API examples can display rich outputs (tables, plots, and more) right on the reference page. See [Writing Docstrings](writing-docstrings.md) for the full guide on structuring docstrings for Great Docs.
# YAML Frontmatter
Every `.qmd` file starts with a YAML block delimited by `---` lines. This block sets metadata that controls how the page is rendered and where it appears in navigation. Think of it as the control panel for the page: it never appears in the body text, but it shapes everything about how the page looks and behaves.
## Required Fields
At minimum, a page needs a `title`:
``` yaml
---
title: "Installation Guide"
---
```
For User Guide pages, you'll also want `guide-section` to control sidebar grouping:
``` yaml
---
title: "Installation Guide"
guide-section: "Getting Started"
---
```
The `title` becomes both the page heading and the label readers see in sidebar navigation, so make it concise and descriptive.
## Common Frontmatter Fields
| Field | Purpose | Example |
|----|----|----|
| `title` | Page heading and sidebar label | `"Quick Start"` |
| `guide-section` | Sidebar section grouping | `"Getting Started"` |
| `tags` | Page tags for filtering and discovery | `[Setup, Configuration]` |
| `toc` | Show table of contents | `true` (default) |
| `toc-depth` | Max heading depth in the TOC | `3` |
The **Table of Contents** (TOC) is the "On this page" sidebar that appears on the right side of every page. It lists the headings on the current page as clickable links, letting readers jump directly to the section they need. By default the TOC is enabled and shows headings down to level 3 (i.e., `##` and `###`). Setting `toc-depth: 2` would limit it to only `##` headings, making the sidebar shorter for pages with many subsections. Setting `toc: false` hides it entirely, which can be useful for very short pages that don't benefit from a navigation outline.
These fields give you fine-grained control over each page's behavior without changing its content.
## YAML Syntax Essentials
YAML is whitespace-sensitive. Here are the patterns you'll use most:
``` yaml
---
# Strings (quotes optional unless the value contains special characters)
title: "My Title"
guide-section: Getting Started
# Booleans
toc: true
# Lists (two equivalent forms)
tags: [Setup, Config]
tags:
- Setup
- Config
---
```
> **Warning: Indentation Matters**
>
> YAML uses spaces, never tabs. Inconsistent indentation will cause a build error. Use 2 spaces per indent level.
You won't need deep YAML knowledge for most pages. The patterns above cover the vast majority of frontmatter you'll write. When in doubt, copy the frontmatter from an existing page and adjust the values.
# Markdown Fundamentals
The body of a `.qmd` file is written in Markdown, a lightweight markup language designed to be readable as plain text while converting cleanly to HTML. If you've never used Markdown, this section covers everything you need to start writing documentation.
## Headings
Use `#` characters to create headings. The number of `#` symbols determines the level:
``` markdown
# Heading 1
## Heading 2
### Heading 3
#### Heading 4
```
In a `.qmd` file, the `title` in frontmatter is the page's top-level heading, so your body content typically starts at `##`:
my-page.qmd
``` markdown
---
title: "Configuration"
---
## Basic Settings
Content here...
### Database Options
More content...
```
Headings automatically appear in the Table of Contents sidebar and serve as anchor targets for linking. Choose heading levels to reflect the logical structure of your content. Don't skip levels (e.g., jumping from `##` to `####`) as this breaks the outline hierarchy.
## Paragraphs and Line Breaks
Paragraphs are separated by blank lines. For example, the following Markdown source:
``` markdown
This is the first paragraph. It can span
multiple lines in the source file and will
be rendered as a single flowing paragraph.
This is a second paragraph.
```
…renders as two paragraphs, with the line breaks within the first paragraph collapsed into spaces.
## Emphasis and Formatting
Markdown provides several ways to emphasize text. Here's the syntax alongside what it produces:
| Syntax | Result | Use For |
|----|----|----|
| `*italic*` or `_italic_` | *italic* | Introducing terms, emphasis |
| `**bold**` or `__bold__` | **bold** | Strong emphasis, important terms |
| `***bold italic***` | ***bold italic*** | Rare, combined emphasis |
| `` `code` `` | `code` | Function names, variables, file paths |
| `~~strikethrough~~` | ~~strikethrough~~ | Deprecated or removed content |
Here's a live example: writing `**Great Docs** makes it *easy* to document your ~~old~~ package` produces the following: **Great Docs** makes it *easy* to document your ~~old~~ package.
Use emphasis purposefully. Bold works well for key terms on first introduction, italic for slight emphasis, and inline code for anything a programmer would type. Overusing emphasis dilutes its effect and makes prose harder to scan.
## Lists
**Unordered lists** use `-`, `*`, or `+`. The syntax:
``` markdown
- First item
- Second item
- Nested item (indent 2 spaces)
- Another nested item
- Third item
```
Renders as:
- First item
- Second item
- Nested item (indent 2 spaces)
- Another nested item
- Third item
**Ordered lists** use numbers followed by a period:
``` markdown
1. First step
2. Second step
3. Third step
```
Which produces:
1. First step
2. Second step
3. Third step
The actual numbers don't matter because Markdown renumbers them automatically. Writing `1.` for every item is a common shorthand that keeps diffs clean when you reorder items.
**Definition lists** pair a term with its definition:
``` markdown
Term
: Definition of the term.
Another term
: Its definition.
```
This renders as:
Term
Definition of the term.
Another term
Its definition.
Lists are one of the most effective tools for organizing information. Use unordered lists for collections where order doesn't matter, ordered lists for sequences and procedures, and definition lists for glossaries or option descriptions.
## Links
Most common are inline links, where you would put the URL right next to the text:
``` markdown
Visit [Quarto's website](https://quarto.org) for more.
```
This renders as: Visit [Quarto's website](https://quarto.org) for more.
For links to other pages in your documentation, use relative paths:
``` markdown
See the [Configuration](configuration.qmd) page.
```
This renders as: See the [Configuration](configuration.md) page.
Liberal cross-linking between pages helps readers navigate your documentation. Reference-style links are especially handy when the same URL appears multiple times or when long URLs would clutter your prose.
## Images
The basic syntax is:
``` markdown

```
For more control over sizing and layout, use Quarto's figure syntax:
``` markdown
{width=80% fig-align="center"}
```
The attributes in curly braces let you set width, height, alignment, and more. Always include meaningful alt text for accessibility. Screen readers rely on it, and it also displays as a placeholder if the image fails to load.
Images and diagrams break up walls of text and can communicate complex ideas far more efficiently than prose. Store images in a subdirectory (e.g., `images/`) to keep your project organized.
## Blockquotes
Prefix lines with `>` to create blockquotes:
``` markdown
> Documentation is a love letter that you write to your future self.
>
> -- Damian Conway
```
This renders as:
> Documentation is a love letter that you write to your future self.
>
> -- Damian Conway
Blockquotes work well for attributing quotes, reproducing terminal output in narrative context, or visually setting apart a passage that you're commenting on.
## Horizontal Rules
Three or more hyphens, asterisks, or underscores on a line create a visual divider:
``` markdown
***
```
Which renders as a horizontal line:
------------------------------------------------------------------------
> **Note: Note**
>
> Because `---` is also used for YAML frontmatter fences, it's safest to use `***` or `___` for horizontal rules in the body of your document to avoid any ambiguity.
Horizontal rules are useful for separating thematically distinct sections within a page when a heading would be too heavy-handed.
## Tables
Use pipes and hyphens to create tables:
``` markdown
| Feature | Status |
|------------|-------------|
| Dark mode | Supported |
| Search | Built-in |
| Mobile | Responsive |
```
This renders as:
| Feature | Status |
|-----------|------------|
| Dark mode | Supported |
| Search | Built-in |
| Mobile | Responsive |
Control column alignment with colons in the separator row:
``` markdown
| Left | Center | Right |
|:-----------|:-----------:|------------:|
| aligned | aligned | aligned |
```
Which produces:
| Left | Center | Right |
|:--------|:-------:|--------:|
| aligned | aligned | aligned |
For tables with long content, the pipes don't need to line up perfectly. Markdown is forgiving about column widths in the source.
Tables are the best way to present structured comparisons, option listings, and reference data. They're much easier to scan than the equivalent information written as prose.
Taken together, the Markdown fundamentals covered in this section are enough to write clear, well-structured documentation pages. The remaining sections introduce Quarto-specific features that take your pages further.
# Code Blocks
Code blocks are essential for technical documentation. Quarto offers several forms, each suited to different purposes: from showing syntax-highlighted snippets to running live code and embedding its output.
## Fenced Code Blocks
Wrap code in triple backticks. Specify the language after the opening fence for syntax highlighting:
```` markdown
```python
import great_docs
docs = great_docs.GreatDocs()
docs.build()
```
````
This renders with full syntax highlighting:
``` python
import great_docs
docs = great_docs.GreatDocs()
docs.build()
```
Quarto supports syntax highlighting for many languages: `python`, `javascript`, `typescript`, `r`, `bash`, `yaml`, `toml`, `json`, `html`, `css`, `sql`, `rust`, `go`, `java`, `cpp`, and more.
Syntax highlighting makes code dramatically easier to read by visually distinguishing keywords, strings, comments, and other language elements. Always specify the language tag. There's no reason to show unhighlighted code.
## Code Block Options
Add a filename label to give readers context about where the code belongs:
```` markdown
```{.python filename="build.py"}
from great_docs import GreatDocs
docs = GreatDocs()
docs.build()
```
````
This renders as:
build.py
``` python
from great_docs import GreatDocs
docs = GreatDocs()
docs.build()
```
The `.python` syntax (with the dot prefix) is Quarto's way of specifying syntax highlighting for non-executable blocks. It's equivalent to plain `python` but allows you to add attributes like `filename`.
Filename labels are a small touch that adds important context. They tell readers *where* a piece of code lives, which is especially valuable in tutorials that span multiple files.
## Executable Code Blocks
Use curly braces around the language name to make a code block executable. Quarto will run the code and embed the output directly in the page:
```` markdown
```{python}
import pandas as pd
df = pd.DataFrame({"x": [1, 2, 3], "y": [4, 5, 6]})
df
```
````
Here's that same block running live:
``` python
import pandas as pd
df = pd.DataFrame({"x": [1, 2, 3], "y": [4, 5, 6]})
df
```
| | x | y |
|-----|-----|-----|
| 0 | 1 | 4 |
| 1 | 2 | 5 |
| 2 | 3 | 6 |
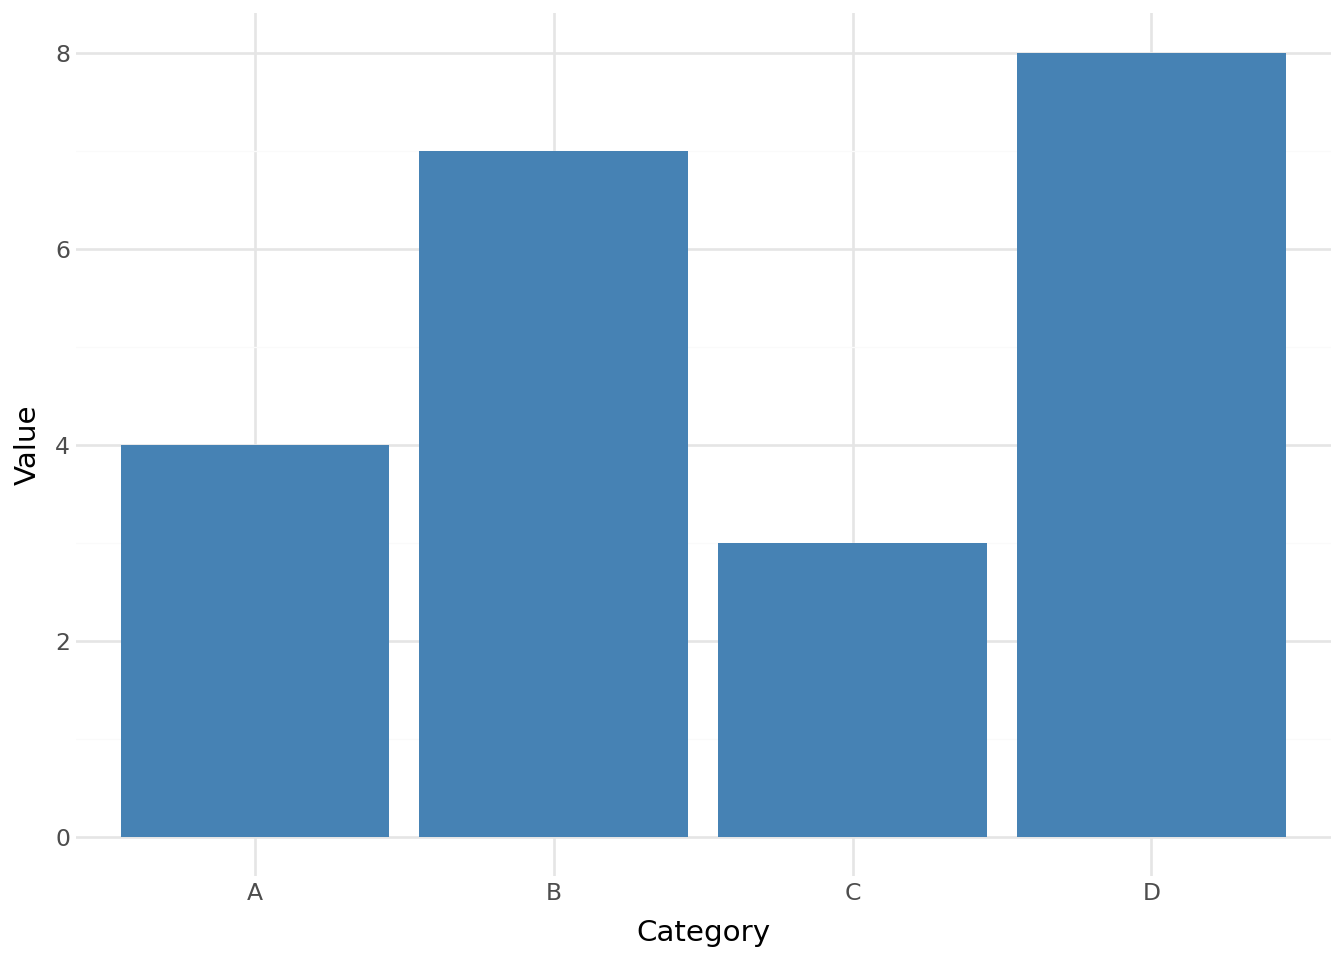
Control execution with hash-pipe (`#|`) options. For example, the following block hides its source code and produces only the figure output with a caption:
```` markdown
```{python}
#| echo: false
#| fig-cap: "A simple plotnine chart"
from plotnine import ggplot, aes, geom_col, theme_minimal, labs
import pandas as pd
df = pd.DataFrame({"category": ["A", "B", "C", "D"], "value": [4, 7, 3, 8]})
(
ggplot(df, aes(x="category", y="value"))
+ geom_col(fill="#4682B4")
+ theme_minimal()
+ labs(x="Category", y="Value")
)
```
````
And here it is rendered (notice only the plot appears because `echo: false` hides the code):
A simple plotnine chart
Common hash-pipe options:
| Option | Effect |
|----|----|
| `#| echo: false` | Hide the source code, show only output |
| `#| eval: false` | Show the code but don't run it |
| `#| output: false` | Run the code but hide the output |
| `#| warning: false` | Suppress warning messages |
| `#| fig-cap: "..."` | Add a caption to figure output |
| `#| label: fig-name` | Create a referenceable label for the figure |
| `#| output-title: "..."` | Wrap the output in a labelled container |
| `#| output-frame: true` | Wrap the output in a bordered container (no title) |
| `#| source-code: mock` | Display one code block but execute another (see below) |
Executable code blocks are what make `.qmd` files more powerful than plain Markdown. They ensure that your documentation's code examples are always tested: if the code breaks, the build fails, so your docs stay in sync with your actual API.
## Output Titles and Frames
Cell output can be wrapped in a styled container using `#| output-title` and `#| output-frame`. These options work on any executable code cell and compose with `source-code: mock`.
**Adding a title.** Use `#| output-title` to wrap output in a bordered container with a label displayed above it. This is useful for marking chat responses, returned values, or any output that benefits from a heading:
```` markdown
```{python}
#| output-title: "Response"
chat.chat("Tell me a joke.")
```
````
**Adding a frame without a title.** Use `#| output-frame: true` to wrap output in a bordered container *without* a title label. This gives text-based output visual containment that it doesn't normally have:
```` markdown
```{python}
#| output-frame: true
from mypackage import greet
greet("World")
```
````
**Rich HTML outputs.** When the output is a rich HTML object (such as a GT table or a styled DataFrame), the frame is automatically removed to avoid a double-border (these objects already carry their own visual structure). With `output-title`, the title appears as a floating label above the output; with `output-frame`, the container is effectively invisible since the object supplies its own styling.
**Composing with mock cells.** Both `output-title` and `output-frame` work naturally with `source-code: mock`. The title or frame applies to the eval cell's output:
```` markdown
```{python}
#| source-code: mock
#| output-title: "Response"
chat.chat("I need your help.")
# ---
chat.chat("I need your help.", debug=True, header=False)
```
````
## Mocked Code Cells
Sometimes you need the code the reader *sees* to differ from the code that actually *runs*. Common reasons include:
- an output requires a debug parameter that shouldn't be shown
- the displayed code uses simplified imports
- you want to hide boilerplate setup
Normally this requires two separate code cells: one for display (`eval: false`) and one for execution (`echo: false`). The `source-code: mock` option collapses these into a single cell.
Place `#| source-code: mock` at the top and separate the display code from the eval code with a `# ---` delimiter:
```` markdown
```{python}
#| source-code: mock
import chatlas as ctl
chat = ctl.ChatOpenAI()
chat.chat("I need your help.")
# ---
import chatlas as ctl
chat = ctl.ChatOpenAI(debug=True)
chat.chat("I need your help.", header=False)
```
````
The reader sees only the clean code above `# ---`, while the code below `# ---` runs and produces the output. Other hash-pipe options (`output-title`, `output-frame`, `warning`, etc.) compose naturally (see [Output Titles and Frames](#output-titles-and-frames) above for examples).
**Edge cases:**
- **No delimiter**: the entire cell is display-only (equivalent to `eval: false`)
- **Multiple `# ---`**: only the first one splits; subsequent ones are part of the eval code
- **Empty eval section**: display-only cell (no output produced)
## Inline Code
Use single backticks for inline code. For example, writing `` The `build()` method generates the HTML output `` renders as: The [build()](../reference/GreatDocs.build.md#great_docs.GreatDocs.build) method generates the HTML output.
Inline code is the workhorse of technical writing. Use it every time you mention a function name, variable, command, file path, or any other literal value. It tells readers "this is something you'd type, not just a word in a sentence".
Code blocks, whether static or executable, are the backbone of any technical documentation page. They let you show readers exactly what to type and exactly what to expect.
# Callouts
Callouts are colored boxes that draw attention to important information. They stand out from the surrounding prose, making them impossible to miss. Quarto provides five built-in types, each with a distinct color and icon:
``` markdown
::: {.callout-note}
Supplementary information that adds context.
:::
```
Here are all five types rendered live:
> **Note: Note**
>
> Supplementary information that adds context. Use notes for background details, clarifications, or "good to know" asides.
> **Tip: Tip**
>
> A helpful suggestion or best practice. Use tips for workflow shortcuts, performance advice, or recommended approaches.
> **Warning: Warning**
>
> Something the reader should be careful about. Use warnings for common mistakes, breaking changes, or compatibility issues.
> **Important: Important**
>
> Critical information the reader must not miss. Use important callouts for security considerations, data integrity, or required prerequisites.
> **Caution: Caution**
>
> Potential for data loss or irreversible actions. Use caution callouts for destructive operations, production deployments, or anything that can't be undone.
## Callouts with Titles
Add a heading inside the callout to give it a custom title:
``` markdown
::: {.callout-tip}
## Pro Tip
You can chain `great-docs init` and `great-docs build` in CI.
:::
```
This renders as:
> **Tip: Pro Tip**
>
> You can chain `great-docs init` and `great-docs build` in CI.
Custom titles let you summarize the callout's message at a glance, which is especially helpful when a page has several callouts.
## Collapsible Callouts
Add `collapse="true"` to make a callout collapsible (readers click to expand):
``` markdown
::: {.callout-note collapse="true"}
## Click to expand
This content is hidden by default.
:::
```
This renders as:
> **Note: Click to expand**
>
> This content is hidden by default. Collapsible callouts are perfect for supplementary details that most readers can skip, like lengthy configuration examples or edge-case explanations.
Collapsible callouts keep pages scannable by hiding secondary detail behind a click. They're ideal for verbose examples, troubleshooting steps, or background context that would otherwise interrupt the flow.
Callouts are one of the most effective tools for guiding readers through your documentation. Use them to flag what matters, but use them sparingly. If everything is highlighted, nothing stands out.
# Tabsets
Tabsets present alternative content in switchable tabs. They're perfect for showing platform-specific instructions or code in multiple languages without cluttering the page with content most readers will skip:
```` markdown
::: {.panel-tabset}
## pip
```bash
pip install great-docs
```
## conda
```bash
conda install great-docs
```
## pipx
```bash
pipx install great-docs
```
:::
````
This renders as a set of clickable tabs:
- pip
- conda
- pipx
``` bash
pip install great-docs
```
``` bash
conda install great-docs
```
``` bash
pipx install great-docs
```
Each `##` heading inside the `::: {.panel-tabset}` block becomes a tab label. Readers click tabs to switch content (no page reload needed).
Tabsets solve a common documentation problem: when you need to present the same information in multiple variants (different operating systems, package managers, programming languages, or framework versions), tabs keep all variants accessible without forcing readers to scroll past the ones they don't need.
# Divs and Spans
Quarto uses a fenced div syntax (borrowed from Pandoc) to apply classes and attributes to blocks of content. The `:::` fences you've already seen in callouts and tabsets are examples of divs. This section covers the general mechanism so you can use it for layout and styling beyond those built-in features.
## Fenced Divs
Wrap content in `:::` with a class name:
``` markdown
::: {.border}
This content has a border around it.
:::
```
This renders as:
This content has a border around it.
Nest divs by using more colons on the outer fence:
``` markdown
:::: {.columns}
::: {.column width="50%"}
Left column content.
:::
::: {.column width="50%"}
Right column content.
:::
::::
```
This renders as:
**Left column**: content placed here appears on the left half of the page.
**Right column**: content placed here appears on the right half of the page.
Fenced divs give you a structural building block for any layout that Markdown alone can't express. Because they're plain text, they stay readable in source and don't require writing raw HTML.
## Spans
Apply classes to inline content with square brackets and curly braces:
``` markdown
This is [important text]{.text-danger} in a sentence.
```
This renders as: This is important text in a sentence.
Spans are the inline counterpart to divs. Use them when you need to style or annotate a word or phrase without affecting the surrounding block.
Divs and spans together give you a complete system for applying structure and styling at any granularity, from full-page layouts down to individual words, all without leaving Markdown.
# Cross-References
Cross-references let you link to specific figures, tables, sections, and other elements by label. Unlike plain links that break when content moves, cross-references resolve by label during the build, so they stay valid as your documentation evolves.
## Linking to Sections
Any heading can be referenced by its auto-generated ID (lowercase, hyphens for spaces):
``` markdown
See [YAML Frontmatter](#yaml-frontmatter) above.
```
This renders as: See [YAML Frontmatter](#yaml-frontmatter) above.
Section links are the simplest form of cross-reference. They help readers jump to related content within the same page without scrolling.
## Linking to Figures
Label a figure with `#fig-` prefix and reference it:
```` markdown
```{python}
#| label: fig-revenue
#| fig-cap: "Quarterly revenue"
import matplotlib.pyplot as plt
plt.plot([1, 2, 3, 4], [10, 15, 13, 17])
plt.show()
```
As shown in @fig-revenue, revenue grew steadily.
````
The `@fig-revenue` syntax creates a numbered link like "Figure 1" that stays correct even if you add more figures. This means you never have to manually update figure numbers; Quarto handles the bookkeeping.
## Linking to Other Pages
Use relative paths for links within your documentation:
``` markdown
See the [Configuration](configuration.qmd) guide for all options.
For API details, see the [GreatDocs](../reference/GreatDocs.qmd) class.
```
These links are validated during the build, so broken references are caught before your site goes live.
Cross-references are essential for any documentation longer than a single page. They weave your pages into a connected whole, letting readers follow their own path through the material.
# Layout and Columns
Quarto supports multi-column layouts for side-by-side content. This is useful for comparisons, before/after examples, or pairing explanatory text with a visual:
``` markdown
:::: {.columns}
::: {.column width="40%"}
### Input
Raw Markdown text goes here.
:::
::: {.column width="60%"}
### Output
The rendered result appears here.
:::
::::
```
This renders as:
**Input**: the left column holds source text or code.
**Output**: the right column holds the rendered result or a larger visual.
You can also use the `layout` attribute on figures for grid arrangements:
``` markdown
::: {layout-ncol=2}


:::
```
Multi-column layouts let you use horizontal space effectively. They're particularly valuable for tutorials where readers benefit from seeing input and output side by side, or for image galleries that would waste space displayed one-per-row.
# Includes
Break large pages into smaller, reusable pieces with the `include` shortcode:
``` markdown
{{< include _shared-setup.qmd >}}
```
This inserts the contents of `_shared-setup.qmd` directly into the page at build time. By convention, included files start with `_` to indicate they aren't standalone pages.
Includes are useful for:
- Shared preambles or setup instructions across multiple pages
- Reusable admonitions or disclaimers
- Content that appears in both the User Guide and README
Includes promote the "write once, use everywhere" principle. When a paragraph or setup block appears in multiple pages, extracting it into an include file means you only need to update it in one place.
## Code Includes
When the `include` shortcode references a code file (anything other than `.qmd` or `.md`), Great Docs automatically wraps the file contents in a syntax-highlighted code block:
``` markdown
{}
```
The language is auto-detected from the file extension. A `.py` file becomes a `python` code block, a `.js` file becomes `javascript`, and so on. This is the same `include` shortcode used for content includes above. Great Docs handles code files automatically while passing `.qmd` and `.md` includes through to Quarto as usual.
Code includes are ideal for keeping documentation in sync with real code. Instead of copying code snippets into your pages (where they can drift out of date), reference the source files directly.
### Including existing source files
If your library already has runnable examples, tests, or configuration files that you want to showcase in the documentation, point `include` at them directly:
``` markdown
{}
{}
{```toml
[build-system]
requires = ["setuptools>=61.0", "wheel", "setuptools_scm>=6.2"]
build-backend = "setuptools.build_meta"
[tool.setuptools_scm]
[project]
name = "great-docs"
dynamic = ["version"]
description = "An easy-to-use documentation site generator for Python packages"
readme = "README.md"
license = {file = "LICENSE"}
authors = [
{name = "Rich Iannone", email = "riannone@me.com"}
]
maintainers = [
{name = "Rich Iannone", email = "riannone@me.com"}
]
keywords = ["documentation", "documentation-generator", "api-documentation", "quarto", "python"]
classifiers = [
"Development Status :: 4 - Beta",
"Intended Audience :: Developers",
"License :: OSI Approved :: MIT License",
"Operating System :: OS Independent",
"Programming Language :: Python :: 3",
"Programming Language :: Python :: 3.11",
"Programming Language :: Python :: 3.12",
"Programming Language :: Python :: 3.13",
"Programming Language :: Python :: 3.14",
"Topic :: Documentation",
"Topic :: Software Development :: Documentation",
"Topic :: Text Processing :: Markup :: HTML",
]
requires-python = ">=3.11"
dependencies = [
"jupyter>=1.1.1",
"py-yaml12>=0.1.0",
"click>=8.0.0",
"griffe~=2.1.0",
"pygments>=2.0.0",
"requests>=2.25.0",
"Pillow>=9.0.0",
"ruff>=0.9.9",
]
[project.optional-dependencies]
svg = [
"cairosvg>=2.5.0",
]
mcp = [
"mcp>=1.0.0",
]
dev = [
"pytest>=6.0",
"pytest-cov>=3.0",
"pytest-xdist>=3.5",
"ruff>=0.9.9",
"mypy>=1.0.0",
"pyright>=1.1.407",
"build>=0.7",
"twine>=3.4",
"great_tables>=0.21.0",
"pandas>=2.0",
"polars>=0.20",
"pyarrow>=12.0",
"mcp>=1.0.0",
]
docs = [
"jupyter>=1.0.0",
"plotnine>=0.13.0",
]
[project.urls]
Homepage = "https://github.com/posit-dev/great-docs"
Repository = "https://github.com/posit-dev/great-docs"
Documentation = "https://posit-dev.github.io/great-docs/"
"Bug Tracker" = "https://github.com/posit-dev/great-docs/issues"
[project.scripts]
great-docs = "great_docs.cli:main"
[tool.setuptools.packages.find]
where = ["."]
include = ["great_docs*"]
[tool.setuptools.package-data]
great_docs = ["assets/*", "assets/.*"]
[tool.setuptools]
include-package-data = true
[tool.pytest.ini_options]
testpaths = ["tests"]
python_files = ["test_*.py", "*_test.py"]
python_classes = ["Test*"]
python_functions = ["test_*"]
addopts = [
"--strict-markers",
"--strict-config",
]
markers = [
"dedicated: test targets one or more specific gdtest_* packages (not a generic sweep)",
]
[tool.coverage.run]
source = ["great_docs"]
omit = [
"*/tests/*",
"*/test_*.py",
"*/__pycache__/*",
"*/site-packages/*",
]
branch = true
[tool.coverage.report]
precision = 2
show_missing = true
skip_covered = false
exclude_lines = [
"pragma: no cover",
"def __repr__",
"raise AssertionError",
"raise NotImplementedError",
"if __name__ == .__main__.:",
"if TYPE_CHECKING:",
"@abstractmethod",
]
[tool.ruff]
line-length = 100
target-version = "py311"
[tool.ruff.lint]
exclude = ["docs", ".venv", "tests/*", "build/*", "dist/*"]
# Select rule sets
select = [
"E", # pycodestyle errors
"W", # pycodestyle warnings
"F", # pyflakes
"I", # isort (import sorting)
]
ignore = [
"E402", # module level import not at top of file
"E501", # line too long (handled by formatter)
"F811", # redefinition of unused name
"E203", # whitespace before ':'
"F841", # local variable assigned but never used
"E702", # multiple statements on one line (semicolon)
]
[tool.ruff.format]
quote-style = "double"
indent-style = "space"
line-ending = "auto"
[tool.ruff.lint.per-file-ignores]
"__init__.py" = ["F401", "E402"]
"tests/*" = ["F401", "E402"]
[tool.pyright]
pythonVersion = "3.11"
typeCheckingMode = "strict"
include = ["great_docs"]
exclude = [
"**/__pycache__",
"**/node_modules",
"**/.venv",
"**/build",
"**/dist",
"tests",
"docs",
]
reportMissingImports = true
reportMissingTypeStubs = false
reportUnusedImport = true
reportUnusedVariable = true
# Additional strict checks from renderer
reportUnnecessaryTypeIgnoreComment = true
reportCallInDefaultInitializer = true
reportPropertyTypeMismatch = true
reportUnusedCallResult = true
[tool.mypy]
python_version = "3.11"
strict = true
warn_return_any = true
warn_unused_configs = true
disallow_untyped_defs = true
disallow_incomplete_defs = true
check_untyped_defs = true
no_implicit_optional = true
warn_redundant_casts = true
warn_unused_ignores = true
exclude = [
"tests/",
"docs/",
"build/",
"dist/",
]
[[tool.mypy.overrides]]
module = [
"yaml.*",
"griffe.*",
]
ignore_missing_imports = true
```}
```
Because paths are resolved relative to the project root, any file in your repository is reachable. This is the primary use case: your code examples are real, tested code that stays in sync automatically. When the source file changes, the documentation updates on the next build with no manual copying required.
### Writing new snippets for the docs
When you need purpose-written examples that don't belong in your library's source tree, place them in an underscore-prefixed subdirectory of your user guide directory (for example, `user_guide/_includes/` or `user_guide/_snippets/`):
``` text
user_guide/
├── _includes/
│ ├── quickstart.py
│ ├── config-example.yaml
│ └── shortcode-demo.qmd
├── 01-introduction.qmd
└── 02-tutorial.qmd
```
Then reference them with a path relative to the user guide directory:
``` markdown
{}
{}
```
This keeps documentation-only snippets close to the pages that use them, separate from the real source code. You can include `.qmd` files as code too, just add the `lang` or `lines` keyword to tell Great Docs to wrap the contents in a fenced code block instead of passing it through to Quarto for rendering.
> **Important: Use underscore-prefixed directories for snippet files**
>
> Directories inside `user_guide/` that contain `.qmd` files are normally treated as content subdirectories. Their `.qmd` files are discovered as user guide pages. A leading underscore (e.g., `_includes/`, `_snippets/`) tells Great Docs to treat the directory as an **asset directory** instead: the files are copied to the build output but are not discovered as standalone pages.
>
> This means you can safely store `.qmd` snippets in `_includes/` without them appearing as pages in your site navigation. Without the underscore prefix, any `.qmd` files in the directory would either be picked up as user guide pages or prevent the directory from being copied as an asset directory.
>
> For non-`.qmd` snippet files (`.py`, `.js`, `.yaml`, etc.), the underscore prefix is not strictly required but using it consistently keeps all your snippet files in one predictable place.
### Options
**Line ranges**: include only specific lines with the `lines` keyword:
``` markdown
{}
```
Line numbers are 1-based and inclusive. This is useful for highlighting a specific function or block without showing the entire file.
**Language override**: override the auto-detected language with the `lang` keyword:
``` markdown
{}
```
**Combining options**: both keywords can be used together:
``` markdown
{}
```
### Path resolution
File paths are resolved relative to the directory containing the `.qmd` file first, then relative to the project root. This two-step lookup means you can use whichever style is most natural:
- `_includes/example.py`: relative to the user guide directory (documentation-only snippets)
- `src/mypackage/utils.py`: relative to the project root (existing source files)
- `tests/test_core.py`: any file in the project tree
If the referenced file is not found, a warning comment is inserted in the output so you can catch broken references during review.
# Math Equations
For technical documentation that involves math, Quarto renders LaTeX equations natively.
**Inline math** uses single dollar signs. For example, `$E = mc^2$` renders as \\E = mc^2\\.
**Display math** uses double dollar signs for centered, standalone equations:
``` markdown
$$
L = \frac{1}{n}\sum_{i=1}^{n}(y_i - \hat{y}_i)^2
$$
```
This renders as:
\\ L = \frac{1}{n}\sum\_{i=1}^{n}(y_i - \hat{y}\_i)^2 \\
Math rendering uses KaTeX, so most LaTeX math commands are supported, from simple expressions like \\\alpha + \beta\\ to complex formulas with fractions, summations, and matrices.
Math support is indispensable for packages that deal with statistics, machine learning, physics, or any domain where precise notation matters. Equations embedded directly in your docs are more readable and maintainable than screenshot images of formulas.
# Raw HTML
When Markdown doesn't offer enough control, you can embed raw HTML directly:
``` markdown
Click to expand
This content is hidden by default but still written in Markdown.
- List item one
- List item two
```
This renders as:
Click to expand
This content is hidden by default but still written in Markdown.
- List item one
- List item two
> **Note: Note**
>
> Use raw HTML sparingly. Markdown content is portable and easier to maintain. Reserve HTML for cases where Markdown and Quarto's built-in features can't achieve the layout you need.
Raw HTML is an escape hatch for the rare cases where Markdown's abstractions aren't sufficient. The `` element shown above is a good example: it creates a native browser disclosure widget that's simpler than a collapsible callout for short asides.
# Comments
Add comments that don't appear in the rendered output:
``` markdown
Content visible to readers.
```
Comments are invisible to readers but visible to anyone editing the source file. Use them to leave notes for yourself or other authors: TODO reminders, explanations of why content is structured a certain way, or placeholders for sections you plan to fill in later. They're a lightweight coordination tool that costs nothing in the rendered output.
# Putting It All Together
Here's a realistic User Guide page that combines many of these features:
user_guide/04-getting-started.qmd
```` yaml
---
title: "Getting Started"
guide-section: "Tutorials"
tags: [Setup, Tutorial]
---
## Prerequisites
Before you begin, make sure you have:
- Python 3.9 or later
- A Python package with a `pyproject.toml`
::: {.callout-tip}
## Virtual Environments
We recommend using a virtual environment to keep your dependencies isolated.
:::
## Installation
::: {.panel-tabset}
## pip
```bash
pip install great-docs
```
## pipx
```bash
pipx install great-docs
```
:::
## Your First Build
Run these two commands from your project root:
```{.bash filename="Terminal"}
great-docs init
great-docs build
```
The generated site is in `great-docs/_site/`. Open `index.html` to preview it.
## What's Next?
| Topic | Page |
|-------|------|
| Customize settings | [Configuration](configuration.qmd) |
| Add narrative docs | [User Guides](user-guides.qmd) |
| Deploy your site | [Deployment](deployment.qmd) |
````
This example uses frontmatter, a list, a callout, a tabset, a code block with a filename label, and a table (all features covered on this page). As you write your own pages, mix and match these building blocks to create documentation that's clear, scannable, and engaging.
# Quick Reference
A compact cheat sheet for the most common `.qmd` authoring patterns:
| Element | Syntax |
|----------------------|---------------------------------|
| Heading | `## My Heading` |
| Bold | `**bold text**` |
| Italic | `*italic text*` |
| Inline code | `` `my_function()` `` |
| Link | `[text](url)` |
| Image | `` |
| Unordered list | `- item` |
| Ordered list | `1. item` |
| Code block | ```` ```python ... ``` ```` |
| Executable block | ```` ```{python} ... ``` ```` |
| Callout | `::: {.callout-note} ... :::` |
| Tabset | `::: {.panel-tabset} ... :::` |
| Cross-ref to section | `[Section Name](#section-name)` |
| Cross-ref to figure | `@fig-label` |
| Inline math | `$E = mc^2$` |
| Display math | `$$ ... $$` |
| Include | `{{< include file.qmd >}}` |
Keep this table close at hand as you write your first few pages. After a short while, the syntax becomes second nature.
# Next Steps
The syntax covered here (frontmatter, Markdown, callouts, tabsets, executable code, cross-references) applies everywhere in Great Docs: user guide pages, docstrings, recipes, and custom sections. Once it's second nature, you're well-prepared to dive into any of these topics:
- [Writing Docstrings](writing-docstrings.md): structure docstrings with sections, executable examples, and Great Docs directives
- [Configuration](configuration.md): customize your site's structure and behavior
- [API Documentation](api-documentation.md): how Great Docs discovers and renders your package's API
- [User Guides](user-guides.md): organize pages into a multi-page guide with sidebar navigation
- [Cross-Referencing](cross-referencing.md): Great Docs' advanced linking system for API symbols